 Success: This is my first attempt at making the torso. I used a cube with sub-divisions along the width to 4, height 2 and depth 3. I know that no methods are written in stone, some people use a sphere to make thinks a little more simple, however I'm following the Methods of the Maya 7 booklet, which is at the intermediate level. My friend Lewis says it's better than the original, but anyways I'm experimenting here. So I to make the cube into this work of art, I switched to verticy mode and moved the points to the refernce pic, (go below to see the refernce). This wasn't difficult just have to make sure that you look at the top, profile and front views to match the shape of the pic.
One thing I feel that I should add is the fact that, my computer is Vista, which means that Maya does not work to full performance. I only learnt this recently, the damn thing freezes almost by any simple commands such as when I was setting up the planes I couldn't move pivot points to the origin (middle) of the grid, because it froze! So I had to do it manually by looking at the 4 views.
 Success: Next after making sure everything looked good in the 1st stage I extruded the torso up to the mid neck height of the reference pic. The book then says to create horizontal line edges for the mid belly, top belly, bottom chest, top chest, low neck and then mid neck. So you have 6 lines to mess with. The next step is then to move the verticy points to the shape of the body, this is were the itch in the ass comes in.
 FAIL: My first attemp at trying to make the necessary curves to the structure of my pic. Now since the book is showing how to model meeper, a character of a 3-d singing movie, I can't follow the necassary movements of the character with my own...obviously. The problem is I got lost where the v-points (verticy points) are located. Things started getting clumped together so much, that they started flickering.

FAIL: I tried to persevere trying to closely follow the example shown in the book, but I think my problem was I was constantly moving from front, to top to side....I was basically everywhere. So I closed and went back to stage 1.

Success: After thinking I decided to concentrate on one view point first trying to follow the example, then I'd move to the front. This is the side view, kinda looks like a kidney bean shape. At the front things started looking more promising, I'm moving points trying to catche that similarity of shape in the book. What I mean is that in the front view, the book shows shadows in the model that indicates that the v-points are not in single file but some are angled differently to one another. Still got a little ways, but it's getting there. Still have this issue in getting lost in the v-points.

 Success: Next after making sure everything looked good in the 1st stage I extruded the torso up to the mid neck height of the reference pic. The book then says to create horizontal line edges for the mid belly, top belly, bottom chest, top chest, low neck and then mid neck. So you have 6 lines to mess with. The next step is then to move the verticy points to the shape of the body, this is were the itch in the ass comes in.
 FAIL: My first attemp at trying to make the necessary curves to the structure of my pic. Now since the book is showing how to model meeper, a character of a 3-d singing movie, I can't follow the necassary movements of the character with my own...obviously. The problem is I got lost where the v-points (verticy points) are located. Things started getting clumped together so much, that they started flickering.
FAIL: I tried to persevere trying to closely follow the example shown in the book, but I think my problem was I was constantly moving from front, to top to side....I was basically everywhere. So I closed and went back to stage 1.

Success: After thinking I decided to concentrate on one view point first trying to follow the example, then I'd move to the front. This is the side view, kinda looks like a kidney bean shape. At the front things started looking more promising, I'm moving points trying to catche that similarity of shape in the book. What I mean is that in the front view, the book shows shadows in the model that indicates that the v-points are not in single file but some are angled differently to one another. Still got a little ways, but it's getting there. Still have this issue in getting lost in the v-points.
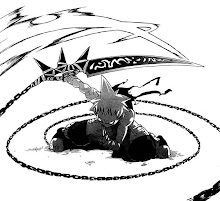
This is the reference of Nah. Now you should have a clear view of what it is I'm trying to achieve. The points on the side of the torso are messing me up, so much that it looks a bit like a netted mess. However I can still persevere on this, if things get worse...I can still use the sphere method to make things quicker. However I believe even that that have its problems, but this is it for now later tonight or tomorrow there should be some new developments. Stay tuned!
No comments:
Post a Comment